Long Weekend DIY Project: A Fire Pit Area with Cape Cod Chairs
- Jennifer Pike
- May 20, 2021
- 4 min read
Looking for a fun weekend DIY project, then you're really going to enjoy building these Cape Cod chairs and fire pit kit from Home Hardware. As a brand ambassador, I'm pleased to show you this step by step build and the end result which will have you roasting marshmallows and hot dogs in no time.
Family fun around the fire, s'mores, weiners...what could be better? Let's admit, outdoor gatherings are where it's at nowadays...am I right?! This will definitely set you up for social distancing success in the fresh air. Let's get started:
Supplies You'll Need to Build the Cape Cod Chairs


Take everything out of the box and lay it out on a work surface to identify all of the pieces. The raised work surface saves your back from being hunkered down on the floor....One less trip to the chiropractor...you're welcome!
As you can see our work surface tables are a tad stained with paint from previous projects! I can assure you, everything is "clean" on these tables--just not pretty to look at.
The instructions were quite easy to follow, but we made a minor mistake that wasn't "pivotal" to the look or construction of the chair the first time around. The mistake we made was that we failed to make sure that the indented screw side was facing the right away at times. That was the only part that wasn't clear in the instructions. Otherwise, it was good to go. The first chair took us about an hour and forty five minutes, the second an hour, the third forty five minutes and the last forty minutes. So not bad at all.

I don't know why that box cutter knife is there...haha, maybe we used it to open the bag of screws??? Also, the directions said to wood glue each piece for extra sturdiness. We opted out of that step, but we will see as time goes on if we made the right choice ;)
You just need a drill, a ratchet and two people to get the job done right. Gloves help avoiding splinters too ;)
Let's Build The Cape Cod Chairs

My hubby, Ken is my rockstar supporter. I have the big ideas and he is my muscle man...so thankful for him! I have been buying personalized t-shirts for him on holidays and his birthday that he can wear during renovations. One of his "funny & sarcastic" comments I put on a "T" is about his theory on coats of paint. The paint cans always say one coat will do it, but we ALL KNOW that is never the case. So after the first coat goes up on the wall, Ken always jokes, "I think one coat will do it" hahaha. If you're interested in getting a funny t-shirt made I can link the etsy shop HERE in edmonton that you can check out.

As I said above, the instructions that come with the chair are easy to follow, however it's nice to see it here being put together step by step.


You will need a little bit of "instinctive spacing" capabilities, basically what I call a being a human leveler. Each slat on the bottom and on the back of the chair has to be spaced out in an even way. We had to eyeball that. It's not a perfect science and to be honest on some chairs there are definitely uneven spacing if you look for it. Overall try your best and if it's off, hopefully nobody will notice...hahaha.


Now that the bottom is built, put aside the base and start on assembling the back.

Start with the middle piece and drill the others in evenly, feathering them out.

Then attach the back of the chair to the base.

Next up will be to secure the chair arms.

We are done!! The first chair build will be longer than the others, so don't get discouraged. Ken and I built one a day on four separate days so that we could ourselves a break. However if you want to take a afternoon, you can definitely build all at one time.

Ta da!!!!! One chair down three to go...

Two done...check!

Three done...check!


Setting Up and Staining Your Cape Cod Chairs
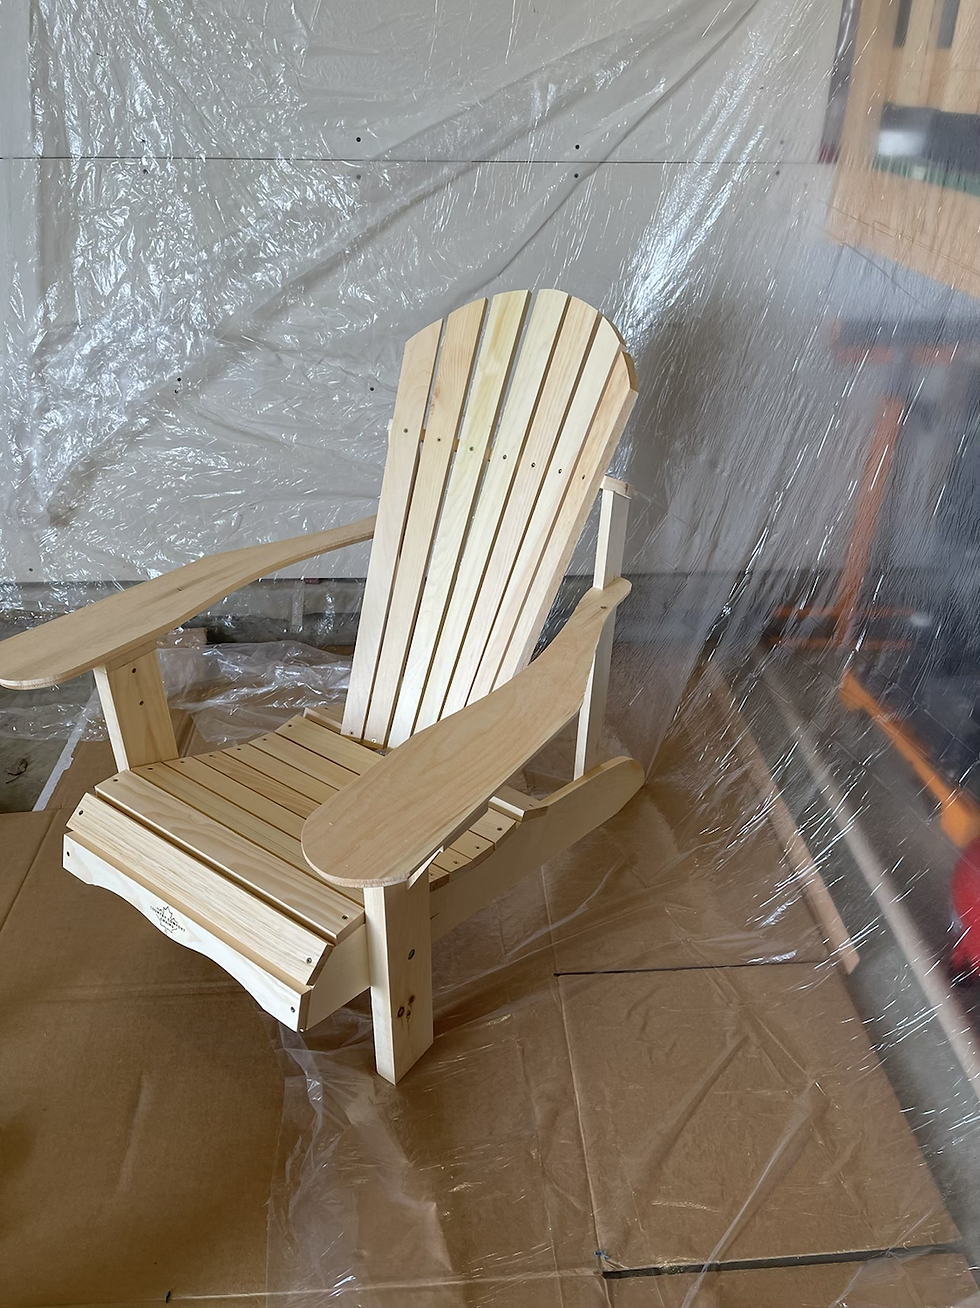
And the fourth! At this point you could give the chairs a light sand if there are any areas that feel rough. We didn't do that part because we like the rugged look.
Let's get ready for stain.

Ken set up a spray area in our garage with plastic and cardboard because it was very cold outside and snow was in the forecast, believe it or not! Otherwise, we probably would've sprayed them outside in the yard. Wear a mask if you do it inside and maybe even have the garage door open if you can. The stain does need a warm environment to dry completely though.
We used a Wagner sprayer but you could use any sprayer you have. We do designate different sprayers for oil based vs latex etc.

Then you will want to back brush afterwards including getting into the cracks and areas the sprayer can't reach.


The amount of coats you do is completely up to you.

We did two coats with back brushing.
Are You Ready To See The Finished Cape Cod Chairs?!?

Grab your hot dog sticks, marshmallows and weiners and get roasting!

These beautiful chairs will last for years to come and I can already see family and friends gathering around.

The natural color tones are so soothing outside.

It looks great next to our DIY privacy wall in the background. You have to check it out!

Let me also tell you about how you can quickly and easily build your own fire pit too! This fire pit kit came from Home Hardware. We laid it easily as per the instructions and placed some river rock stone around it, four bags to be exact.


The area is the perfect fit for any backyard and we are thrilled to add this beautiful element to our continuing backyard development. Did you see my blog post on the gazebo build last year?

Outdoor throw pillows in this deep navy color and soft plaid blanket completes the ozy outdoor look!


Thanks for coming along for this fire pit and chair DIY. Stay tuned this summer as we continue on with our backyard development. We are adding a beautiful Mesa flagstone patio and hot tub area! Have a great long weekend Canada!!! And for my American friends, enjoy the Memorial Day weekend coming up soon! See you again soon -Ken and Jenn xoxoxo


I really enjoyed reading about your DIY fire pit project, it sounds like such a cozy and fun space to build. Last summer, I tried a small outdoor setup too, but balancing studies made it hard. I remember even thinking about do my assignment just to get free time for projects like that. Your idea shows how creativity can turn simple spaces into something special and relaxing. Nice post