Out of the Ruin Came a Backyard Oasis in 2020
- Jennifer Pike
- Aug 11, 2020
- 5 min read
It's 2020...the year we all stayed home. I guess the pandemic gave us a little push to create our own backyard stay-cation oasis that we had been putting off for so long.
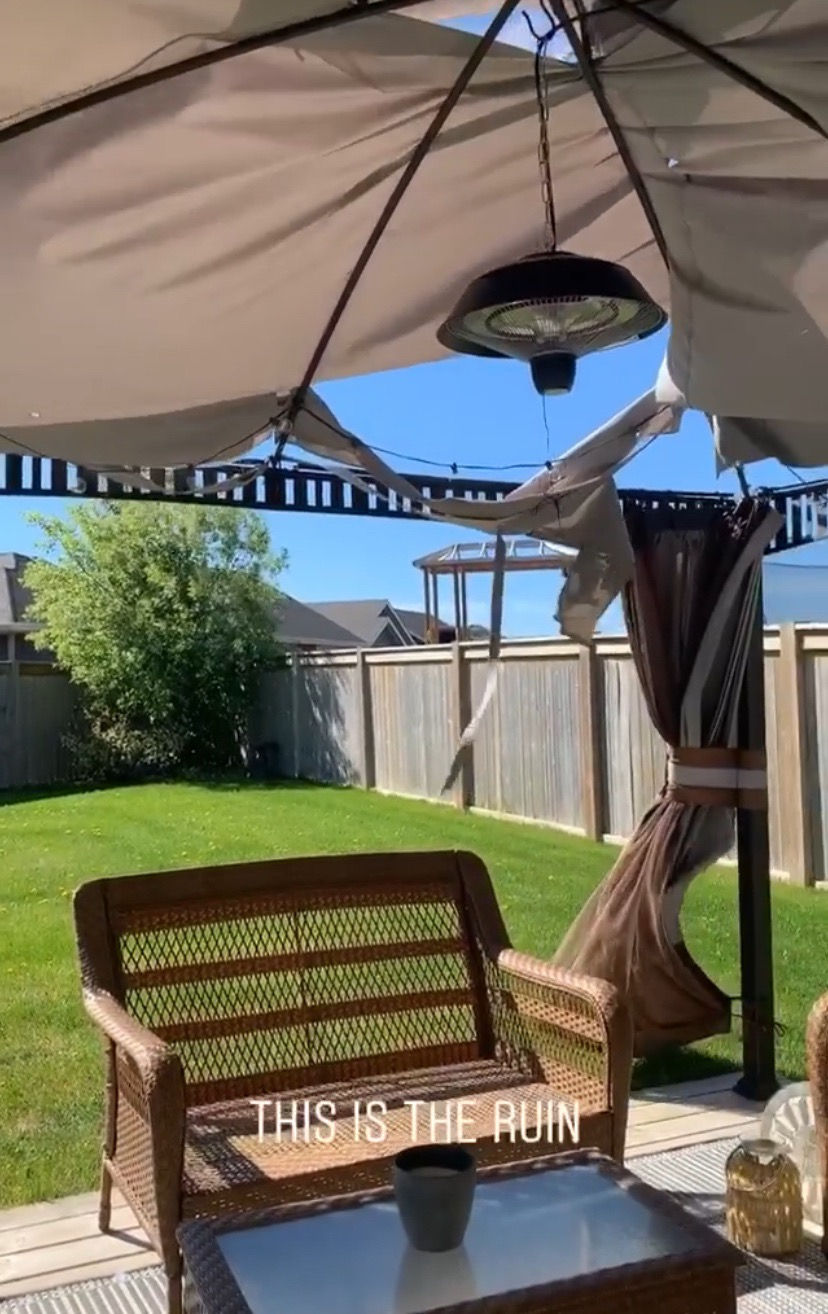
Our store-bought $399 fabric gazebo got completely pulverized by a storm in May (not the first time) and my husband and I were at the end of our rope when it came to gazebo's. This was our 1-2-3-4-5-6-7-8th gazebo we had tried over our 16 years living out west and we knew that it was time to invest in something that the big bad wolf couldn't blow down on us little piggy's anymore ;). This turned into updating quite a few areas outside.
Here are the areas: I'll break up the blog post into three separate sections. The gazebo, the dining area and the shed. You guys saw the privacy wall back in June so I won't go over that again, but it is linked in this blog if you want to see it again.
Let's start with the shed. It's the cutest!!!
Backyard Oasis: The Shed
Well...it WILL be the cutest...after we dress her in charming cedar shakes, paint on some black "eyeliner", add some "bronzer", and some "jewelry", aka -a light fixture and a new handle. As you can see here, she's a mess! But I could see her potential!! The first strokes of black paint made it 100% better already.


Side note: the previous owners used the shed for their dog and had a doggy door there. We had to fix that area to have it lay flat with the other board. We removed the piece and fixed it with wood from in behind.

I had always wanted to cedar shake something and this was the perfect thing to try it on.

The cedar smell in our backyard was unreal :)


My husband had to hand cut these boards down to 4, 5 ,6 and 7 inch wide slats because the store was sold out of the cut pieces. That was pretty time consuming. I recommend buying pieces that have already been cut, if possible.
We had a learning curve at first, trying to figure out how to get that first bottom line nice and straight, fiddling with the pressure of the nail gun and knowing where to nail the shake in so it wouldn't split plus be really strong too. It's kind of like wall paper that way. The first line is the most important. You start on the bottom and work your way up however, always laying the next row of boards on top of the seam below so that water can't get in. We used a chalk line to mark where we wanted each row of shakes to go. We didn't keep to any hard fast rule about patterns but tried to keep it fairly random.


Here it is without stain! I told you it would be cute!


We chose to stain it the same color as our deck.
Now for the barn light installation. Unfortunately, it's just for show because we don't have an electrical light hook up. I think we may get a remote battery operated puck light for it at some point if I can find one to fit. Here's a link for the light.


We removed the old latch and installed a new handle. P.S- I can't wait to stain that fence!


She's a cute little shed now! Check out my Instagram BACKYARD highlight for an in depth look at the process if you're interested.
Backyard Oasis: Dining Area
You guys saw my last blog post where we made the privacy wall around our dining area, but I haven't shown you the completed design look with the new dining set and decor!

We love our new teak set! It's modern and timeless all at the same time. I added a few touches of green around the walls and a floor plant as well.


These super adorable succulent hanging pieces are in my amazon storefront linked here.
They have held up to the weather beautifully.

This simple sleek rug is in my store too and I have to say, it has held up so well! The wind didn't even affect it.
The teak table set is from Wayfair.

The tall heater has an awesome fire feature and feels so good on those cool nights. It's from Costco and they do not have my particular one in stock, but here is one very similar.


This little bistro set is from Amazon and the palm leaf mat is from IKEA. Outdoor plant is Homesense -they always have such a good variety of plants there.

We spend so much time out here now. We try to have coffee in the mornings and supper in the evenings. It'll be so hard to close it all down come September, but it'll be back next year in May.
Backyard Oasis: The Gazebo
I'll show you a before picture...


It's hard to believe it's the same place now! So much has changed. We started out having a local builder -Rosswill Homes, to figure this part out. There was no way that Ken and I would've been able to DIY this part.

There was an issue with getting some of our materials in because of Covid-19 so we decided to go ahead and decorate with just the bones up.
We added:
(shop my links! I will get a small commission on anything purchased from my amazon shop but that's it! The rest are just there to help you shop ;) )
-Cream drapes and black rods
-A variety of hanging macrame with faux plants
-Some industrial black string lights
-A B&W stripped rug (that I used to have in the dining room)
-A hammock chair and pouf
-A set of super soft and comfy cushions for the sun bathing loungers
-Gather Together metal sign (that also uses to be in the dining room)
So here are the long awaited pics...


Loving it all so far? Here are some pis of it all together....eeeeeek!!


This is actually a great time to get a glimpse of what it will look like inside since the screen isn't installed yet. As we speak the posts are being wrapped in black cladding and the screen is FINALLY getting one step closer to being installed after a long awaited 6-8 weeks of delay. We debated keeping it natural with an open airy feel but honestly with the bugs, it will fit our lifestyle to have it all enclosed and weather resistant.
One of the best things about this outdoor area are the Alexa compatible plugs we used for the hanging lights. One voice command of, "Alexa, turn on gazebo lights" and they illuminate! We hooked up our fountain and the lights and it's super easy to turn on and off. I'll link them below in my amazon shop along with the echo.
Stay tuned for the third part of the backyard renovations as we finish up the gazebo, stain the fence and wrap it all up just in time for fall...lol!
Next year we want to add the window shutters and perhaps a hot tub area! Subscribe and you'll never miss a post. Thanks for reading and sharing in my home adventures! Follow me over on my other social media platforms like Instagram, Facebook and Pinterest. Links are all on the home page, friends. Have a good week Homies!!!! -Jenn xoxoxo Thanks for reading and taking the time to be here!!!


Comments