I'm Hoping on the Color Blocking Craze!
- Jennifer Pike
- Aug 19, 2020
- 3 min read
Before I jump in to the awesome color blocking craze hitting the nation, I have to talk about the possible elephant in the "blog". I know most bloggers are posting fall decor inspiration posts right now, so I'm sorry if this isn't one of those...I just can't let go of summer just yet! Summer is my favorite time of year and if you have ever lived in the west, particularly in Alberta and Saskatchewan area, YOU KNOW that summer is maybe 6-8 weeks long -if that! We had some glorious weather during our stay-cation this year, but before that it was constant cool temps and rain. The morning I first starting writing this blog post it was 6 degrees when I woke up!! Fall is definitely on the way, but I HAVE to wait until the very end of August (for my mental health lol) to start decorating or posting about fall. How about you?? Tell me below in the comments about your feeling concerning summer/fall. If you are desperately craving fall then I'll link some posts from previous years for you here and here.

Alright...now to talk about what you're REALLY here for...COLOR BLOCKING clap-clap-clap. Do you ever get that itching, desperate urge to DIY something, or is it just me? I was looking at my kitchen stools which I recently painted from black to white (in February I think) and thought, "These need a little touch of something!" So I decided to use a little leftover paint I had on hand from our board and batten wall treatment this spring -Grey Owl by Benjamin Moore, and add a color blocking detail to the feet. Or, as my husband calls them: socks for stools hahaha. He's cute ;)
Here's a before pic or two:

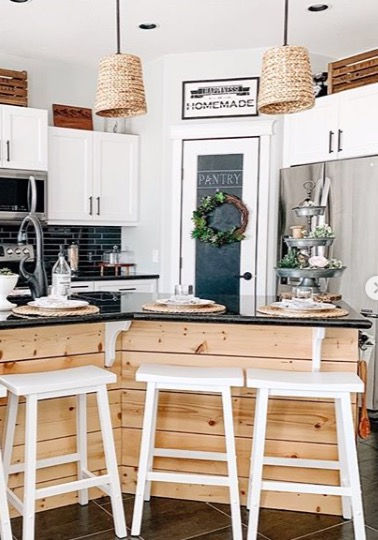
There's nothing wrong with these at all. In fact, I love the white look a lot. You'll see at the end of the post, the change is very subtle, but I love how it matches my color blocked gray and white curtains in the main area.


(Amazon photo above. click photo if you want to purchase!)

I love them! Ok, let's get started on this simple step by step DIY.
Step One
Find a spot where you'd like to paint them and give them a gentle wipe down with soap and water.

I like having them up high when I paint them, but it's totally up to you.

Place something under your project to protect your surface. I used paper plates here.

Step Two
Tape off the section where you want to paint. I ran out of green painter's tape, so I used masking tape.
You can do this color blocking technique with anything: baskets, vases, side tables, walls, mirrors, planters, lamps and anything really! I'm using latex wall paint, but a lot of people use spray paint too.
Here are some of my favorite examples from other people's projects:


So beautiful and the sky is the limit with color blocking! PS-It's kind of hard to see where I placed the tape since it's off white.

You could also paint your whole stool gray at this point and leave the white strip unpainted. Then you'd have a cute color blocked diy in reverse!
Step Three
Time to paint! Use a regular 1 inch paint brush and some wall/furniture paint. I did two coats leaving a couple of hours of dry time in between.


Step Four
Remove the tape very gently and you're done! It took me one afternoon to get a fun new look on my stools. What project would you paint in this color blocking style if you could?


Tell me what you think below! I'm excited to see more of this trend around Instagram. Did you know that Instagram has a new REELS feature? Check out mine on my page! I made a REEL for these cute stools.
Have a great week Homies!!! Much love and thanks for supporting and reading my blog today. -Jenn xoxoxo


Comments